- ブログ
ピーナッツバターで空き瓶クラフト-Peanut Butter Jar craft
〜マクラメハンギング-macrame hangings〜

空いたビン、どうしようかなぁ、なんて思ったことありませんか。
少しアレンジするだけでとってもオシャレなアイテムに大変身するんですよ。
今回はアリサンのピーナッツバター空き瓶を使ってマクラメハンギングにチャレンジ♪
初心者の方でも簡単にできるものをご紹介します。
夏休みのクラフト課題にお子さんとチャレンジしたい方にもお薦め。
今回ご紹介するのは写真の右から2番目。初心者でも2時間くらいでできます!
必要なものはこちら↓(画像をクリックすると拡大します。)
Have you ever wondered what you should do with your empty bottles?
With just a little arrangement, they can be transformed into very stylish items.
This time, I’m going to challenge you to make macrame hanging using an empty Alishan peanut butter jar.
I’ll show you how easy it is for beginners to do, and I also recommend it to those who want to challenge themselves with their children for a summer vacation craft project.
This time I’ll show you the second one from the right in the photo. Even a beginner can do it in about two hours!
Here’s what you need ↓ (click on the image to enlarge)
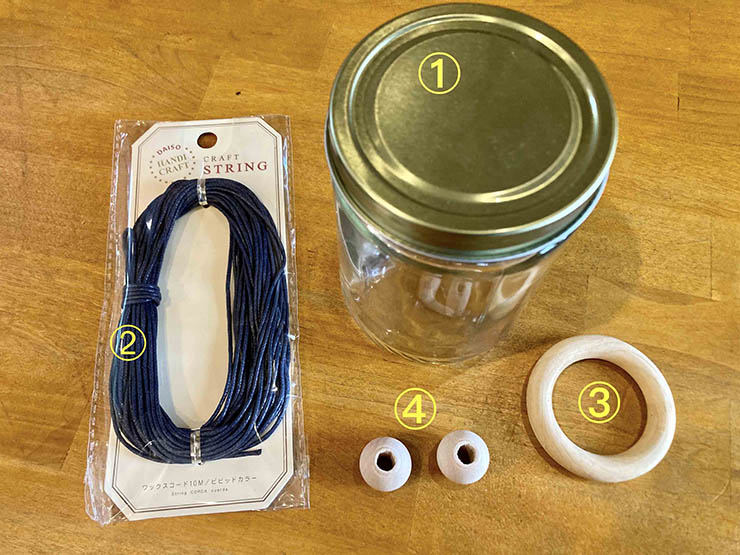
①アリサンピーナッツバターの空き瓶
②お好きな紐約10m程度(ここでは100円ショップのワックスコード10mのものを使用)
③直径3cm〜6cmくらいの輪っか(ここではウッドの6cm輪っかを使用)
④お好きなビーズ(あればでOK。ない場合はそこの工程を飛ばします。
ここではウッドビーズ、穴は6mmのものを使用)
1) A clean, empty Alishan peanut butter jar.
2) About 10 meters of your favorite cord (in this case, we used 10 meters of wax cord from a 100 yen shop)
3) A 3cm to 6cm diameter loop (in this case, a 6cm wood loop is used)
4) Beads of your choice (if you have any. If not, skip this step.)
(In this case, we use wood beads with 6mm holes.
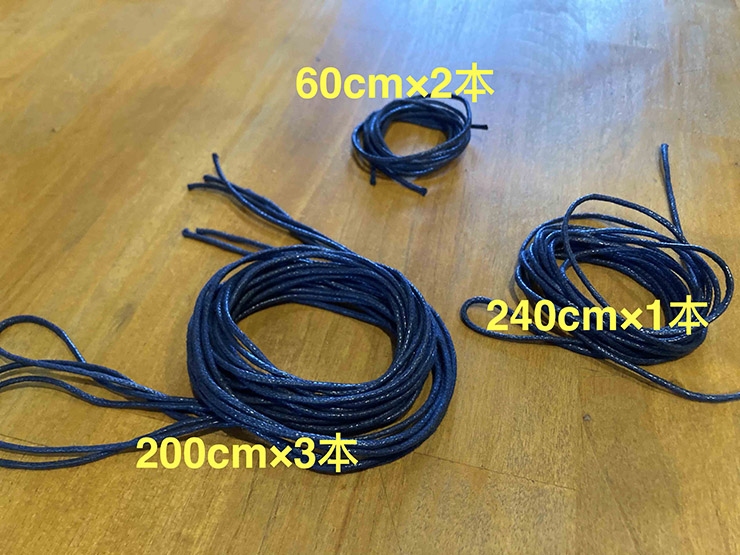
まずは紐を必要な長さに切ります。
200cm×3本、240cm×1本、60cm×2本です。
(10Mの紐を買ったのになぜか960cmしかありませんでした。。。)
First, cut the string to the length you need.
3 x 200cm, 1 x 240cm, and 2 x 60cm strings.
(I bought 10 meters of string but for some reason only had 960cm…)

200cmの3本と240cmの1本をそれぞれ2つ折りにして輪っかに通します。
Fold each of the three 200cm strands and one 240cm strand in half and thread them through the loop.
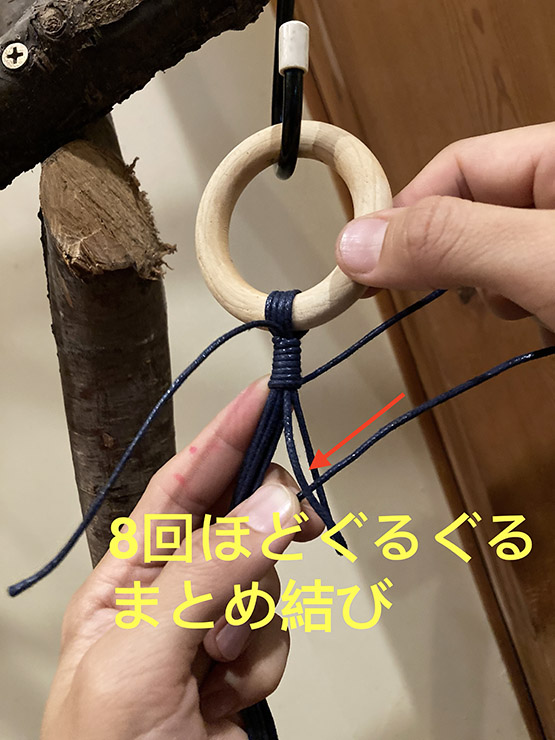
60cmの紐を少し折り返し8回ほどぐるぐるとまとめ結びをします。(まとめ結びのやり方はこちらをクリック。)
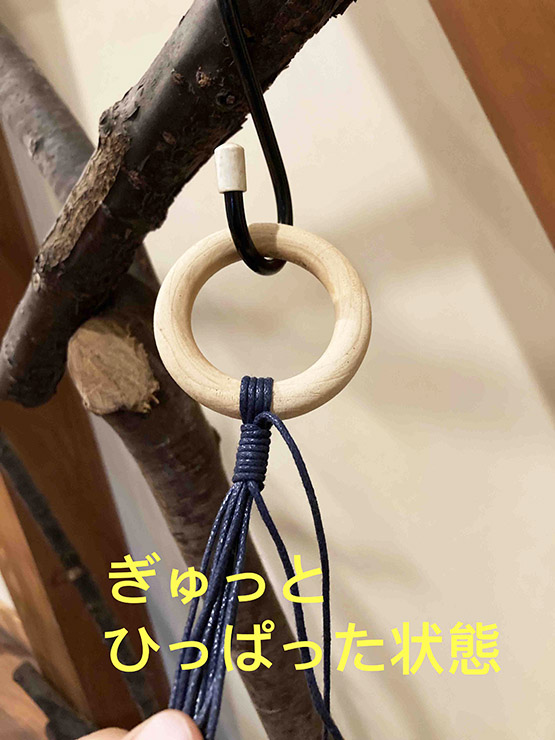
上下の紐をぎゅっとひっぱった後に残った部分は、ギリギリのところで切ります。接着材は不要です。
After pulling the top and bottom strings tightly, cut the remaining part. No glue is needed.

長い2本を両端に持っていき、残り6本を真ん中の芯にしてねじり結びを8回します。
Take the two longest strands at each end and tie a nejirimusubi eight times, using the remaining six strands as the core in the middle.
(Click here to learn how to tie a nejirimusubi.)

真ん中6本にウッドビーズを通します。(ビーズを通さない人はこの工程は省いて下さい。)
Thread the wood beads through the middle 6 strands. (If you don’t want to thread beads, skip this step.)
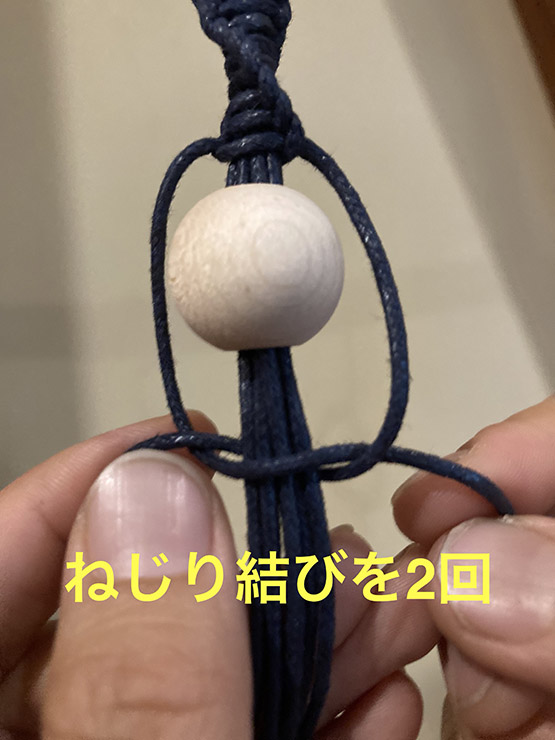
ウッドビーズを挟んでねじり結び2回。(ビーズを通さない人はこの工程も省きます。)
さらにビーズをもう一つ通して同様にねじり結び2回。(ビーズを通さない人はこの工程も省きます。)
Tie a nejijrimusubi with a wood bead in between. (If you don’t want to thread the beads, skip this step too.)
Thread another bead and tie a nejijrimusubi twice.
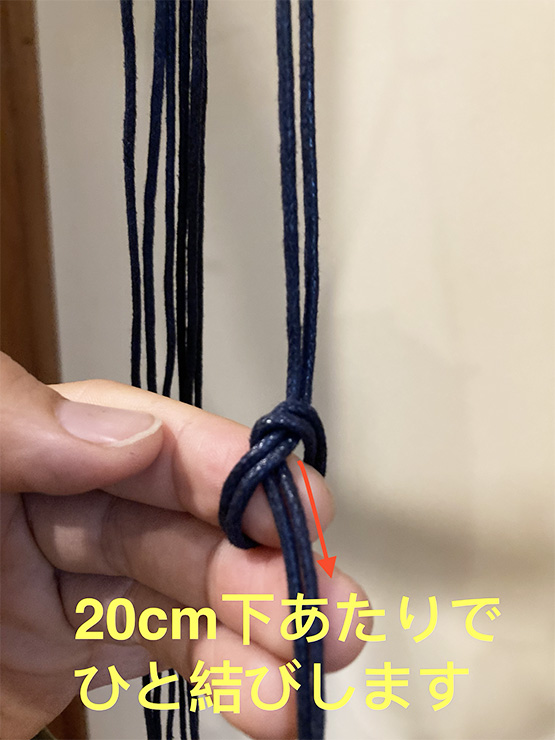
隣り合わせの2本1組で20cm下あたりでひと結びをします。
Tie a knot about 20cm below the bottom of each pair of adjacent strands.
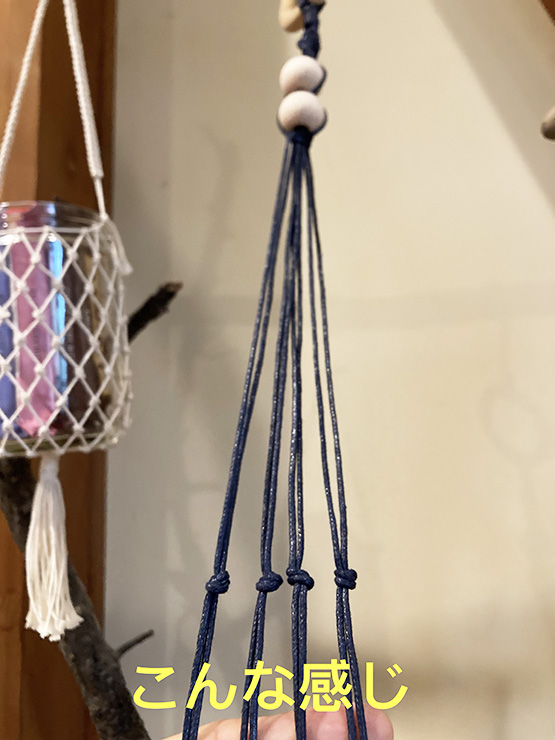
こんな感じになったら、
If it goes like this,
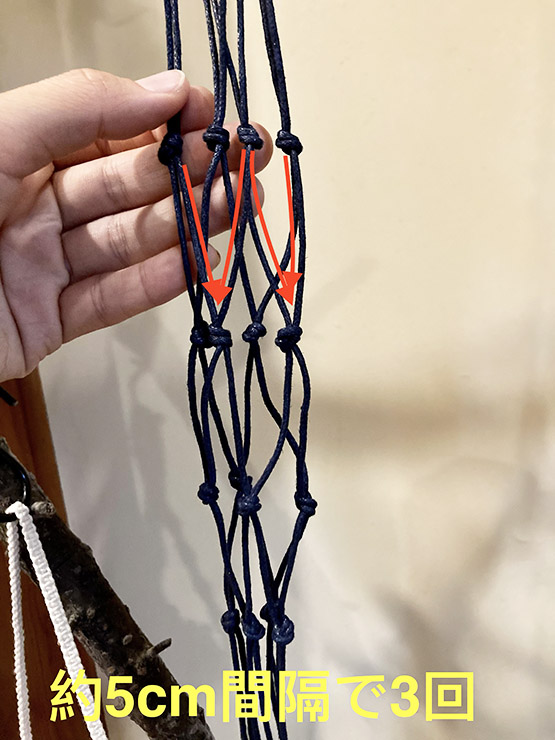
それぞれのひと結びから1本ずつの2本を1組にして約5cm下で再度ひと結び。
同様に5cm感覚で3回下に結んでいきます。
From each knot, make a pair of two strands, one from each knot,
and tie a second knot about 5 cm down, and then tie a third knots about 5 cm down each.

最後の結び目のところより約2cm下のところでまとめ結びをします。
Tie a matomemusubi about 2cm below the last knot.
(Click here for instructions on how to tie the matomemusubi.)
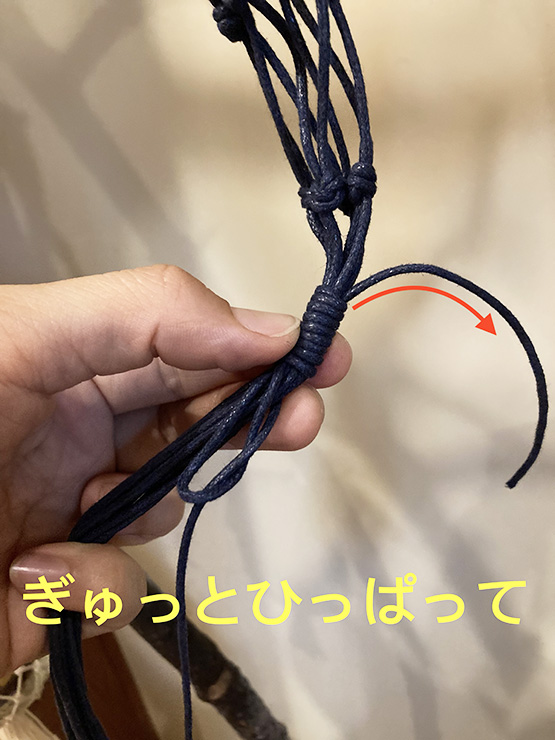
ぎゅっとひっぱって余った紐を切ったら、、、
pulled it tight, cut the excess string, and…
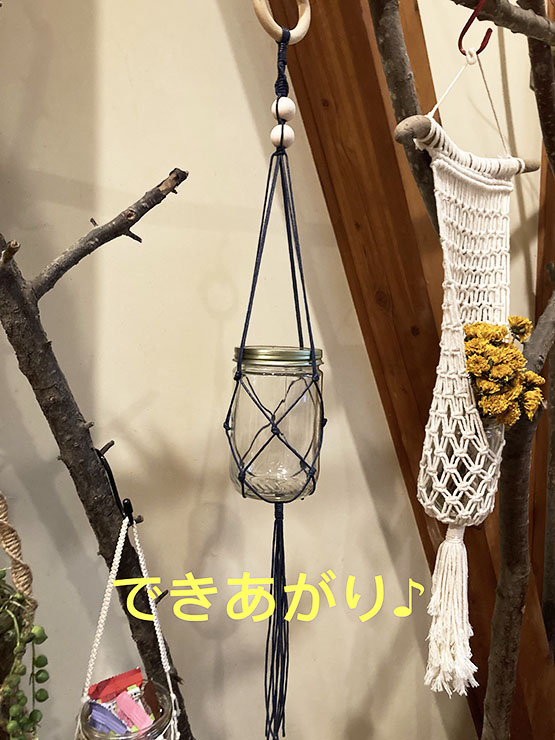
完成です♪ お好きなものを入れて楽しんでください。
最後までお付き合い頂きありがとうございました。
It’s finished♪ Please enjoy putting in whatever you like.
Thank you for staying with us until the end.
Warning: Parameter 2 to wp_hide_post_Public::query_posts_join() expected to be a reference, value given in /var/www/vhosts/alishan-organics.com/httpdocs/wordpress/wp-includes/class-wp-hook.php on line 286


