- レシピ
発芽パン Sprouted Wheat Bread
材料
Material
- 小麦粒Wheat berries
- 3 1/2 カップ3 1/2 cups (I used our hard red winter wheat grain)
- お湯Warm water
- 大さじ2 2 tbsp
- ドライイーストDry yeast
- 小さじ1と小さじ1/2 1 1/2 tsp
- メープルシロップMaple syrup
- 大さじ33 tbsp
- 塩Salt
- 小さじ22 tsp
- プードプロセッサーA food processor
作り方
麦を発芽させます。麦が2倍に膨らむため、大きめのボウルを用意し麦を入れます。
水を浸るくらい入れ、清潔な布を被せて18時間ほど放置します。ザルに上げて水切りをし、また布を被せ、太陽の光に浴たらせて発芽させます。発芽するまでは、朝と夜の2回、麦をささっと水洗います。
発芽してくるまで1日〜2日かかります。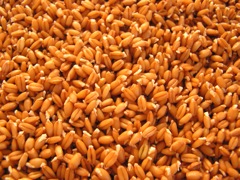
発芽したら、ザルに水切りをし、可能ならば30分ほど放置して少し乾燥させます。
生地を練るときに水は使わないため、麦は完全には乾燥させず、少し水けが残るくらいにします。
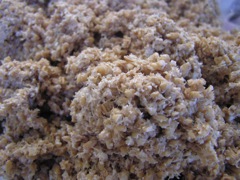
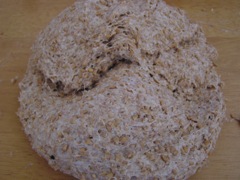
フードプロセッサーに発芽した麦を入れ、写真のように丸い形になるまで練ります。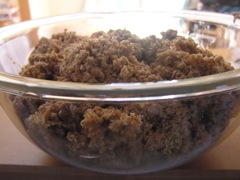
酵母を発酵させます。ドライイーストをお湯に入れ、5分ほど置きます。
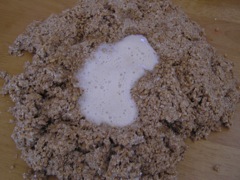
生地をテーブルに広げます。真ん中に穴のスペースを作り、そこにお湯でもどしておいたドライイーストと、シポップと塩を入れて生地に練りこみます。
この時点で生地になるとは創造できなくても、小麦粉は絶対に入れないでください!
10分後ほどすれば、生地が発酵して膨らんでくるので、練り続けてください。
ボウルに生地を移し入れ、濡れた布で覆い、暖かい場所に1時間〜2時間ほど置いて、2倍に膨れるまで待ちます。
空気を抜くため生地を押したら、また布を被せてさらに1時間〜2時間ほど置きます。
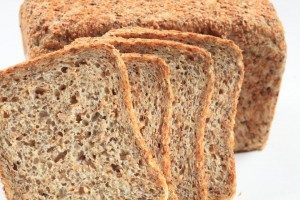
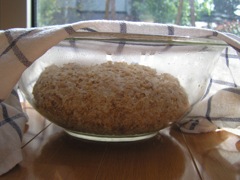
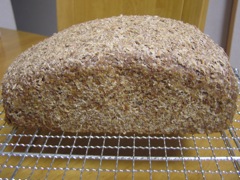
オーブンを180℃に温めている間に、生地を楕円形に形成し、パンを焼く鍋にオイルを敷き生地を置いておきます。45分間ほど焼きます。写真のように焼き上がればラッキーです。

Recipe
First you need to sprout your wheat. You’re going to need a very large bowl as the grain swells up to about double it’s size. Put in the grain , fill with water, cover with a clean cloth and leave to soak for about 18 hours.
Next drain off the water (having a lid with holes or a sieve will help though I managed without), re-cover with the cloth and leave out of sunlight to sprout. You’ll need to keep rinsing the grains morning and night until it begins to sprout. This should take a day or two. You can see the grain just beginning to sprout in the photo below.
Once the grain reaches this stage it’s time to grind. Again, having a good food processor will help but I managed with a little one. First drain off all the water and if possible leave for half an hour or so in a sieve for it to air dry. If you’re using a bowl as I did the water can collect at the bottom making it difficult to drain off.
You don’t want the grain dripping wet, just slightly damp – there is no additional water added to form the dough. You will probably have to grind the grain in batches – I did about five. Tip the grain into your food processor and let it grind until a ball forms. It should look something like this:
Next you will have to prove your yeast. Add the dried yeast to the warm water and leave for about five minutes until it’s frothy.
Whilst it’s proving clean a large space on your table and spread out your grain, making a well in the center. When the yeast is ready pour it into the well along with the syrup and the salt. Fold these ingredients into the grain.
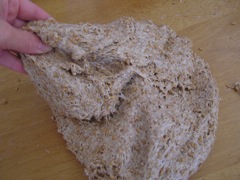
DO NOT ADD FLOUR! At the start it’s unbelievable that the grain will form a dough. It will be falling all over the table and breaking apart but keep at it.
After about ten minutes (yes, ten) it will start to form a cohesive ball. Keep on kneading for another five or ten minutes (it’s tough I know but worth it!) and you’ll end up with a regular elastic bread dough.
Place the dough in a bowl, cover with a damp cloth and leave it somewhere warm for an hour or two or until it has doubled in size.
Press out the dough to get rid of any air bubbles, cover with the cloth again and leave for another hour or two. Press out the dough again and shape into an oblong. Place the dough in an oiled bread pan, cover again with the cloth and leave somewhere warm for about an hour. Meanwhile heat your oven to 180 degrees.
Bake the loaf for 45 minutes or until it sounds hollow when you tap the bottom. With any luck you’ll end up with a loaf which looks something like the one below! I had a bit of trouble draining the water off the grain (I kept finding bits of grain all over my kitchen for days!) so ended up with a denser loaf than I should have done. We’d love to see some photos of your loaves!


